You read that right! I've got a simple diy project to share with you today. I find myself wearing this hair comb all the time. It's perfect for pinning those baby hairs up and still staying cute.
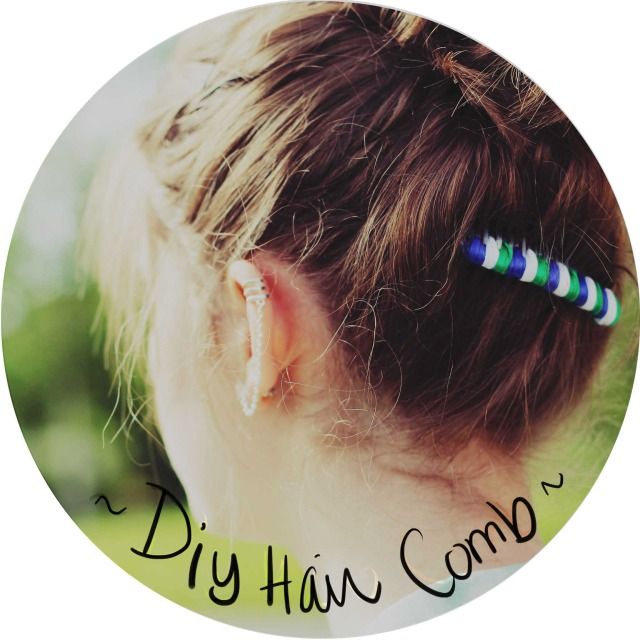
All you'll need is a comb and some ribbon or yarn, as well as a hot glue gun. The comb was leftover from one of my many high school productions (it still smells a bit like hairspray and stage lights). Previously I had used some fuzzy yarn, the cool kind that changes color, but I didn't quite like the colors it had so I decided to go with some fun ribbon! You can use as many or as few colors as you like. For this tutorial I'll use three, but know that if you only use one color, you'll only need one string of it tied to your comb.
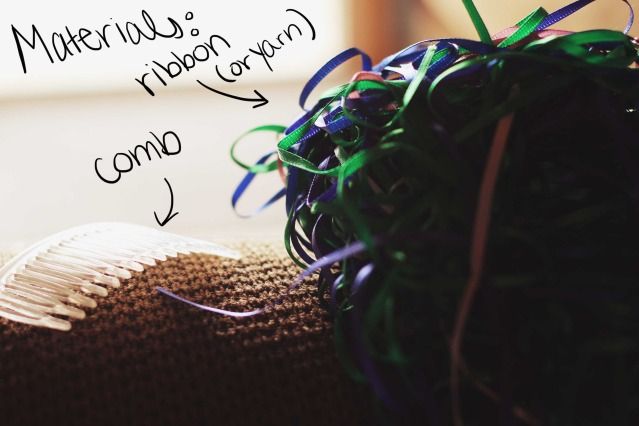
Step one: tie string. Skipping the first notch (aka hole) of your comb, tie the various colors on the second, third, and fourth notch.
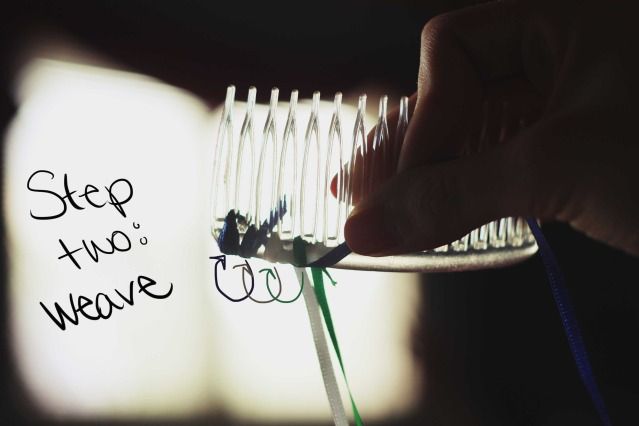
Step two: weave. You're going to be working backwards for just a bit. You'll weave the blue string (on the second notch) on the first notch, the white string (on the third notch) on the third notch, and so on. Then after that it's time to move forward.
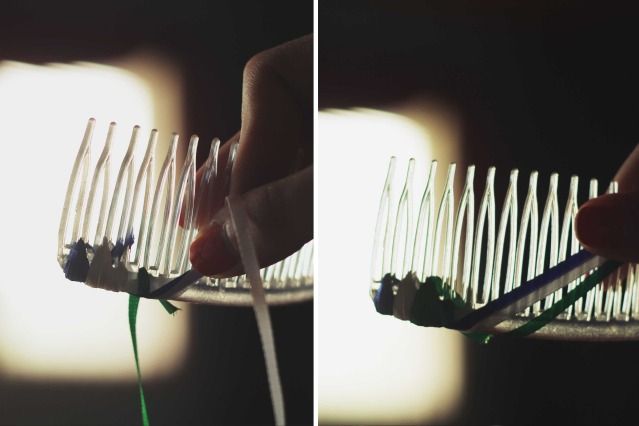
It reminds me a lot of making friendship bracelets, where you bring the strings that you're not currently weaving off to the side. Continue to do this until you reach the end of your comb.
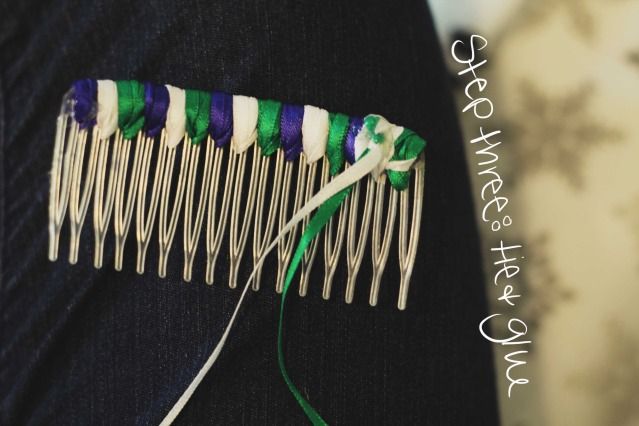
Step three: tie and glue. Just tie the string together (I suggest tying the blue to the white and then the white to the green, so that all three colors are secure), and then reinforce with hot glue. (You can also hot glue the beginning if you notice the string is a little loose.)
And there you have it! A beautiful new hair accessory I guarantee you'll be wearing non-stop.
Let me know if you have any questions.
No comments:
Post a Comment